

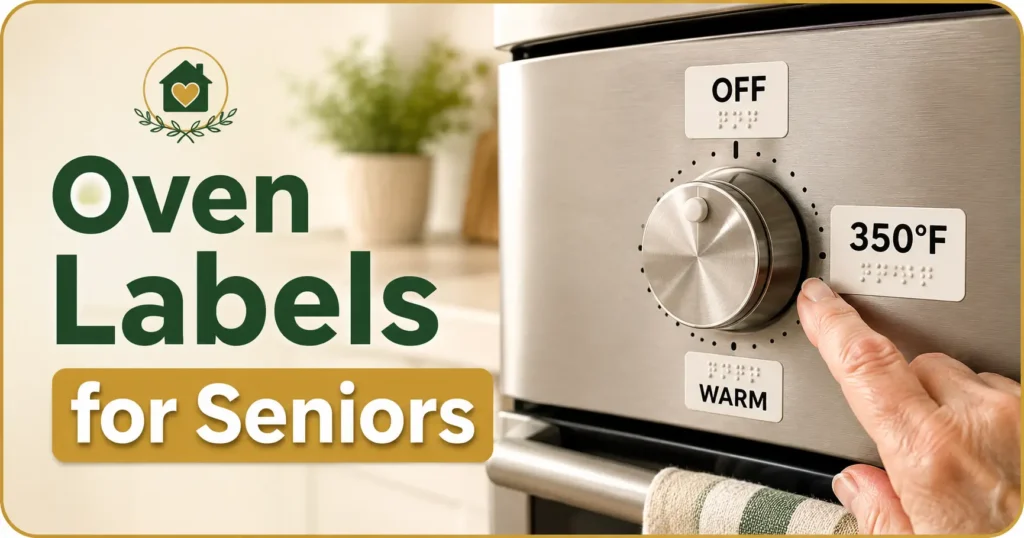
Safer aging-in-place kitchen guide
How to Label Oven Temperature Controls
for Older Adults
An oven control panel can become a tiny map viewed at dusk. The numbers are present, yet glare, faded markings, crowded knobs, and similar-looking symbols make the correct setting surprisingly difficult to find.
A well-designed labeling system can restore confidence without covering the appliance in a thicket of stickers. The goal is not to mark everything. It is to make the safest landmarks, especially OFF and one or two familiar temperatures, easy to recognize from the person’s normal cooking position.
This guide shows caregivers, older adults, and aging-in-place households how to map the controls, choose readable labels, add tactile cues carefully, test the finished setup, and recognize when labels are no longer enough.
See it clearly
Choose contrast, type size, spacing, and finish for aging eyes.
Touch it safely
Use tactile landmarks without blocking movement, lights, or displays.
Know the limit
Identify mechanical, memory, and safety problems that stickers cannot solve.
The safest label is not the biggest one. It is the one the user can find, understand, and return to OFF without coaching. 🔥
Snapshot
This guide is for older adults who can use an oven safely but struggle to read or locate its controls, and for caregivers creating a clearer kitchen setup. You will learn how to label the correct controls, compare low-cost and professional options, test the system in real use, and decide whether a different safety measure is needed.
Table of Contents

Before You Label: Know What Stickers Can and Cannot Fix
Oven labels are visibility and identification aids. They may help someone find a faded temperature, distinguish the oven control from a burner knob, or locate the OFF position more quickly.
They cannot repair a loose knob, correct an inaccurate thermostat, prevent every accidental activation, or compensate for someone who no longer remembers that the oven is running. That distinction matters because a neat-looking modification can create false reassurance.
Before You Act
This article provides general home-safety and low-vision guidance. It does not replace appliance repair, individualized occupational-therapy advice, or a cognitive-safety assessment. Keep all original markings and warnings visible. Stop using the oven if its controls, display, temperature selection, indicator lights, or shutoff behavior seem unreliable.
Who oven-control labels may help
- An older adult who cooks familiar meals but cannot read faded numbers without bending close to the panel.
- A person with reduced contrast sensitivity who loses the pointer among closely spaced markings.
- Someone who benefits from one tactile reference point before turning a physical knob.
- A caregiver replacing handwritten notes with a consistent, tested system.
- A household simplifying several similar controls without redesigning the appliance.
Who may need more than labels
Labels should not be the only intervention when the user repeatedly forgets the oven is on, confuses oven and stovetop controls, cannot recognize OFF consistently, burns cookware, or loses track of familiar cooking steps.
In those situations, options may include supervision, control locks, knob covers, removing knobs when the appliance is unused, automatic shutoff features, meal-preparation support, or an occupational-therapy home assessment. Our broader guide to kitchen appliance safety for seniors can help families review the whole cooking area rather than one control panel.
Key takeaway: Use labels for a reading or recognition problem. Do not use them to disguise a mechanical fault or a growing inability to cook safely.
Map the Controls Before One Sticker Goes On
Before choosing a font or buying tactile dots, make a control map. This is the quiet, unglamorous step that prevents the most serious labeling error: pointing a clear label at the wrong control.
Photograph the original panel first
Take one straight-on photograph of the entire oven face before adding anything. Then take close photographs of each control cluster, the knob pointers, the display, warning text, indicator lights, control-lock symbols, and factory temperature markings.
These photos provide a reference if a label shifts, a knob is removed for cleaning, or another caregiver needs to understand what was changed.
Separate the oven function from the oven temperature
Some ranges use one knob for mode and another for temperature. Others combine several functions into a display or touch panel. Front-mounted controls may sit in a row with nearly identical burner knobs.
Write a temporary control map on paper before creating permanent labels:
- Oven mode: Bake, broil, convection, warm, clean, or other functions.
- Oven temperature: The control or display that changes heat settings.
- Cooktop burners: Front, rear, left, and right positions.
- Timer and clock: Controls that may display numbers without changing oven temperature.
- Start and cancel: Buttons that confirm or stop a programmed selection.
- Control lock: A safety feature that may prevent unintended input when used correctly.
Confirm which pointer meets which marking
A knob may have a line, notch, arrow, raised rib, or colored insert that points toward the selected setting. The panel may provide the reference mark instead. Do not assume the widest part of the knob is the pointer.
With the oven cool and unused, turn the control through its normal range while watching how the factory pointer aligns. Return it fully to OFF. If the knob feels loose, rotates without a firm stop, or does not align with the original markings, pause the labeling project and arrange an appliance check.
Real-world example: the right number on the wrong knob
A daughter notices that her father leans close to the range whenever he bakes. She prints a bold 350°F label and places it beside the clearest-looking knob.
The label is easy to read. Unfortunately, the knob controls the front burner. The true oven temperature is selected on the digital panel above it.
The error is caught before cooking because they test the system together. The lesson is simple: readability comes second. Control identification comes first.
They photograph the panel, mark each function on removable paper tabs, and rehearse the full sequence. Only then do they create permanent labels for BAKE, 350°F, START, CANCEL, and OFF.
Choose One Labeling System, Not a Patchwork Quilt
A good system is predictable. The same type of cue should mean the same thing each time. One red dot, one blue strip, two handwritten arrows, and three unrelated stickers may look helpful individually, yet together they become visual static.
Use text for settings that must be understood
Important functions should use plain language rather than private codes that only one caregiver remembers. Useful labels may include:
- OFF
- BAKE
- BROIL
- START
- CANCEL
- BAKE 350°F
- TURN LEFT TO 350°F, when a short directional instruction is genuinely needed
Pairing function and temperature can prevent a floating “350” from being mistaken for a timer, clock, or unrelated control.
Use tactile markers as landmarks, not full instructions
A tactile marker can help a person locate a starting point by touch. It should not require memorizing a long code such as one dot for 300°F, two for 325°F, three for 350°F, and four for 375°F. That turns a simple panel into a tiny abacus.
A more manageable pattern might be one distinctive raised marker beside OFF and a different marker beside the most frequently used baking temperature. See our comparison of bump dots versus tactile tape when choosing between point landmarks and longer directional guides.
Let color support meaning rather than carry it
Color can make a label faster to spot, but it should not be the only difference between important settings. Lighting conditions, glare, color-vision changes, and faded materials can all weaken a color-only system.
Combine color with text, location, shape, or texture. For example, OFF might use large white text on a black matte label plus one raised square. The primary baking setting might use black text on a pale yellow matte label plus two small raised dots.
Choose materials that suit the actual panel
Use labels intended for smooth household surfaces, and confirm that the chosen material is appropriate for the panel’s normal temperature, finish, and cleaning method. Place labels only on cool, stationary areas.
- Avoid labels that curl, become gummy, or slide when the panel is cleaned.
- Avoid glossy finishes that reflect overhead light.
- Avoid thick materials near a rotating knob.
- Avoid adhesives that could damage a rented appliance or a delicate printed finish.
- Test removable material in an inconspicuous area when surface damage is a concern.
Key takeaway: Important settings should remain understandable without relying on color alone. Use words, placement, shape, or touch as a second path to meaning.
The five-part labeling process
Map, Mark, Read, Rehearse, Recheck
1. Map
Identify every knob, button, pointer, light, and warning.
2. Mark
Label OFF and only the most-used settings first.
3. Read
Check contrast, glare, spacing, and standing distance.
4. Rehearse
Complete a familiar task without coaching.
5. Recheck
Inspect alignment, adhesion, and safe use regularly.
Make the Labels Readable From a Real Cooking Distance
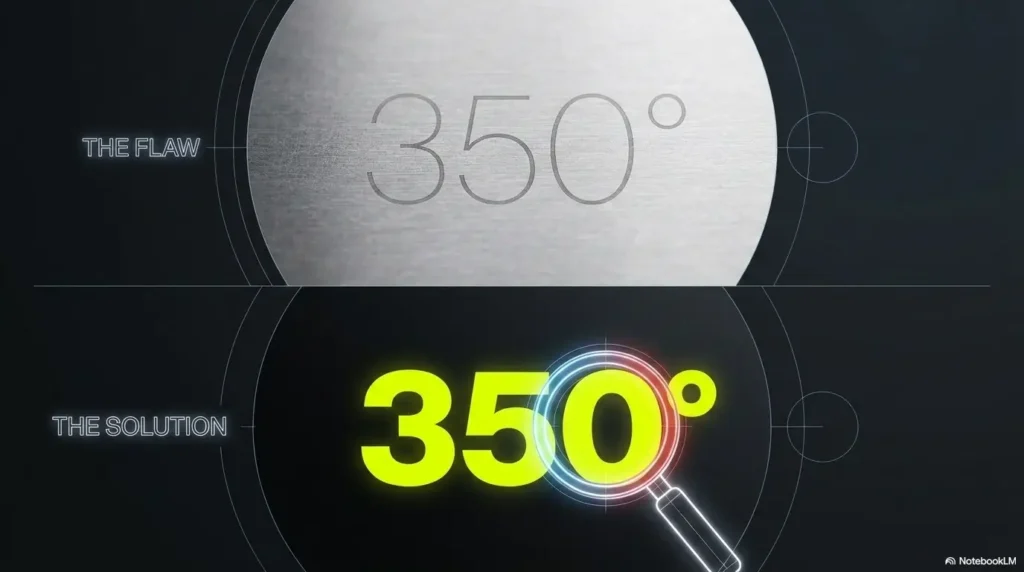
A label that looks perfect from six inches away may disappear when the user stands naturally in front of the oven. Design and test from the actual viewing position, under the lighting normally used for cooking.
Choose contrast before choosing a favorite color
Dark lettering on a light background or light lettering on a dark background usually provides a strong starting point. The exact choice depends on the color of the appliance and the user’s vision.
A white label may vanish on a white range. A black label may blend into a glossy black control panel. Create a visible boundary between the label and its surroundings, and favor a matte or low-glare surface.
The accessibility principles in the ADA Standards for Accessible Design offer useful context for readable contrast and character design, although a home appliance modification is not the same as a building-signage project.
Use plain characters with breathing room
Choose a simple sans-serif typeface with thick, clear strokes. Avoid script, condensed lettering, thin decorative fonts, shadows that blur the edges, and tightly packed numbers.
- Use uppercase for short control words such as OFF, BAKE, START, and CANCEL.
- Keep numbers distinct, especially 3, 5, 6, 8, and 9.
- Leave space around the label so nearby markings do not compete with it.
- Use the degree symbol and F when temperature context may be unclear.
- Print one sample before producing the full set.
Our guide to the best font size for seniors explains why viewing distance, contrast, and letter shape matter as much as the number printed in the font menu.
Run the standing-position test
- Place a temporary sample beside the intended control.
- Ask the user to stand where they normally cook.
- Use the kitchen lighting they normally use.
- Ask them to read the label without bending, squinting, or using a phone flashlight.
- Check again when sunlight or overhead reflections are strongest.
If the person must move unusually close, the answer may be a larger label, stronger contrast, improved task lighting, less glare, or a different control method. Bigger text alone is not always the cure.
Watch for glare, shadow, and visual crowding
Glossy control panels can reflect ceiling lights directly into the user’s eyes. A label may also sit in the shadow of a protruding knob, especially when the person stands slightly to one side.
Move the label beside the control rather than beneath the knob when that improves visibility, but keep the relationship unmistakable. A short pointer line may help only when it cannot be confused with the factory pointer.
Key takeaway: Test the label where cooking happens. If it works only during close-up installation, it has not passed the real-world test.
Mark OFF First, Then Add the Temperatures That Matter
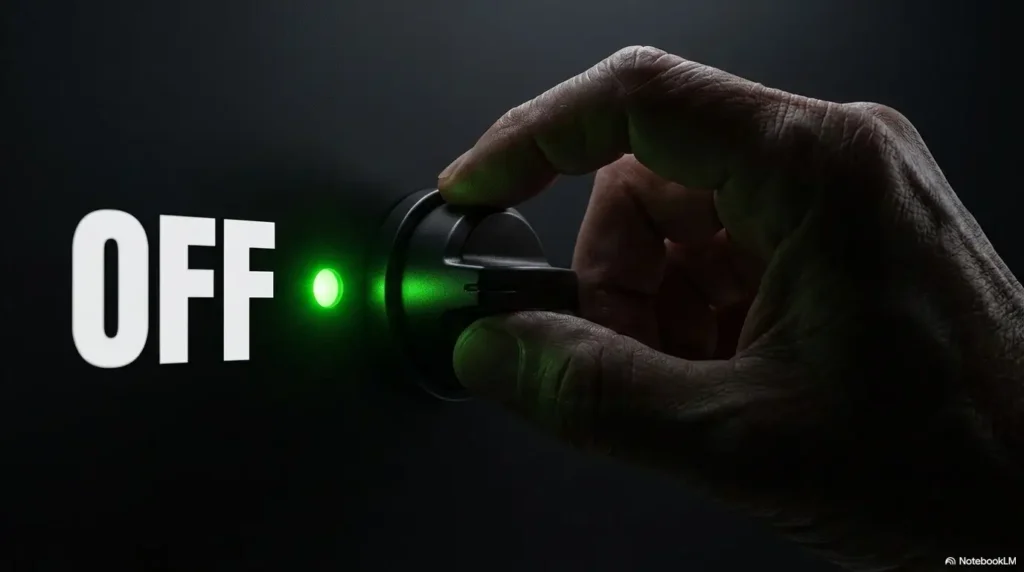
OFF is the anchor point. It is where the task begins, where it ends, and where the user or caregiver checks that heat has stopped. Give it more visual and tactile importance than any cooking temperature.
Give OFF the strongest visual hierarchy
OFF can be made easier to find through size, contrast, spacing, or one unique tactile shape. Do not rely on color alone, and do not place a new OFF label where it could be mistaken for the factory OFF position of a neighboring burner.
For front-mounted range controls, also review stove knob safety for seniors, including accidental contact, knob alignment, and control-lock questions.
Label one or two frequent temperatures, not every increment
Many people use one primary baking temperature and perhaps one second setting for a familiar dish. Start there. Covering every 25-degree increment can rebuild the clutter that caused the original problem.
| Priority | Label | Why it earns space |
|---|---|---|
| First | OFF | Provides a consistent starting and ending landmark. |
| Second | BAKE 350°F or the person’s most-used setting | Supports the most frequent familiar task. |
| Third | A second common temperature | Useful only when it is genuinely used often. |
| Optional | START or CANCEL | Helpful on digital panels where a selection must be confirmed or cleared. |
| Usually avoid | Every available temperature | Can create crowding, decision load, and alignment errors. |
Pair the setting with a familiar cooking routine
A label is easier to learn when it belongs to a stable routine. A caregiver might pair BAKE 350°F with a large-print recipe card that begins, “Set oven to BAKE 350°F, then press START.”
Keep the sequence brief and consistent. Our guide to recipe cards for seniors offers ideas for reducing visual clutter and separating one action from the next.
Why fewer cues often work better
Show me the nerdy details
A control panel asks the user to find a target, distinguish it from nearby targets, interpret its meaning, and connect it to the correct physical action. Closely packed labels increase the number of items competing for attention.
Tactile systems have a similar limit. Small differences between several nearly identical dots may be difficult to identify quickly, especially with reduced fingertip sensation, arthritis, tremor, or unfamiliarity.
A few high-value landmarks reduce the search area. OFF becomes the home position. The primary baking setting becomes the familiar destination. Other settings remain available through the original panel, caregiver help, or an alternative cooking method.
Test the Labels With a Five-Step Kitchen Trial
Installation is not the finish line. A labeling system must work for the person who will use it, during a normal task, without an installer standing nearby and pointing.
The five-step trial
- Find OFF before operating the oven. Ask the user to point to or touch the OFF landmark without coaching.
- Select one familiar setting. Use a routine task rather than an artificial demonstration.
- Confirm mode and temperature aloud. The person should identify both BAKE and the intended temperature when the appliance requires both.
- Return the control to OFF. Confirm that the pointer, label, and actual stop position agree.
- Repeat after several days. Recheck when the setup is no longer new and the caregiver is not guiding each step.
Observe before offering a rescue prompt
Caregivers naturally want to help the moment a pause appears. During testing, allow a little time to see whether the user can locate the cue independently.
Watch for repeated scanning, reaching toward the wrong knob, touching a capacitive panel accidentally, leaning too close, or turning the control beyond the intended position. These details reveal whether the problem is readability, mapping, dexterity, memory, or appliance design.
Record what happened, not merely whether the task was completed
| Observation | Possible meaning | Next adjustment |
|---|---|---|
| User finds OFF but not 350°F | Temperature label may be too small, crowded, or poorly placed. | Increase contrast, spacing, or simplify to one temperature. |
| User reads the label but turns the wrong knob | Control mapping is unclear. | Add the function name and reposition the label beside the correct control. |
| User touches nearby buttons unintentionally | Touchscreen layout may lack safe landmarks. | Check control lock, audible feedback, or alternative controls. |
| User cannot turn the knob accurately | Grip strength, pain, tremor, or knob design may be the barrier. | Consider an occupational-therapy assessment or a different appliance interface. |
| User forgets the oven is operating | The primary risk is not label readability. | Reassess supervision, shutoff options, and independent cooking. |
Recheck after cleaning and routine use
Labels can fade, curl, slide, collect grease, or become less distinct as lighting and vision change. Inspect them after cleaning and whenever a knob is removed or the panel is serviced.
- Confirm that labels remain aligned with the factory markings.
- Make sure adhesive edges are flat and secure.
- Check that tactile dots have not shifted.
- Confirm that every control still moves freely.
- Retest OFF and the primary temperature.
- Replace labels that are glossy, stained, faded, or difficult to distinguish.
Key takeaway: A system that works only while the caregiver is pointing has not proved itself. Test immediate use, delayed use, and the return to OFF.
Compare DIY Labels, Prepared Kits, and Professional Help
The best oven-control labeling option depends on the user’s vision, dexterity, memory, appliance design, and budget. A low-cost trial is often sensible before paying for custom materials, provided the temporary setup is safe and closely supervised.
Good, better, and best setups
| Setup | Typical components | Relative cost | Best for | Main caution |
|---|---|---|---|---|
| Good: supervised DIY trial | Removable matte labels, bold marker, printed words, one temporary tactile cue | $ | Testing placement, wording, and contrast before committing | Temporary materials may fade, curl, shift, or leave residue |
| Better: durable custom system | Consistent printed labels, matte finish, carefully selected tactile markers, photographed control map | $$ | Stable vision needs and a control panel that can be safely modified | Custom labels still require user testing and regular inspection |
| Best: individualized assessment | Low-vision or occupational-therapy evaluation, task analysis, lighting review, appliance comparison, caregiver plan | $$$ | Multiple barriers involving vision, reach, grip, touchscreens, or cognition | Professional help cannot make every appliance or situation safe for independent use |
When a simple DIY approach may be enough
A basic system may be reasonable when the person understands the oven, follows familiar recipes, recognizes that cooking is underway, and has a narrow problem such as faded numbers or weak contrast.
- The appliance operates normally.
- The user can identify each control after it is mapped.
- One or two labels solve the main difficulty.
- The user can return the oven to OFF reliably.
- A caregiver can supervise the trial and check the result later.
What to compare before buying a label kit or tactile markers
- Contrast: Will the label remain distinct from the appliance finish?
- Glare: Is the surface matte or likely to reflect overhead light?
- Character clarity: Are numbers and short words easy to distinguish?
- Adhesive behavior: Is it suitable for the surface and normal cleaning routine?
- Thickness: Could it interfere with a rotating knob or a nearby button?
- Tactile distinction: Can the chosen shapes be told apart easily?
- Removal: Can labels be replaced without damaging factory markings?
- Quantity: Does the kit encourage useful simplicity or unnecessary panel clutter?
Questions to ask an occupational therapist or low-vision professional
- Is the main barrier contrast, central vision, field loss, glare, hand function, memory, or control design?
- Would lighting changes help more than larger labels?
- Are tactile markers appropriate given fingertip sensation and tremor?
- Can the current oven be used safely without bending or reaching over hot surfaces?
- Would audible feedback, physical knobs, voice support, or a different appliance interface be easier?
- What signs should trigger supervised cooking or stopping independent oven use?
The American Foundation for the Blind’s appliance accessibility guidance explains why physical controls, tactile distinctions, consistent feedback, and accessible digital interfaces matter for people who are blind or have low vision.
Common Labeling Mistakes That Create New Hazards
The wrong label can be more dangerous than a hard-to-read panel because it invites confident use. Review the following mistakes before making any modification permanent.
Covering factory information
Never hide warning text, indicator lights, control-lock symbols, display information, vent openings, the original OFF marking, or the manufacturer’s reference line.
Place the new cue beside the factory information. The modification should clarify the original panel, not replace it with an unofficial control scheme.
Labeling a removable knob without checking alignment
Some knobs can be removed for cleaning or service. If they are reinstalled incorrectly, a label attached to the knob face may no longer correspond with the appliance’s true setting.
Whenever possible, place reference labels on a stable panel area beside the correct factory position. After a knob has been removed, verify its alignment before use.
Adding too many identical tactile markers
Five identical dots placed close together create a tactile maze. Use the fewest markers needed and make important meanings distinct.
Do not place tactile products where they can obstruct a button, prevent a knob from turning fully, cover a light, or contact a hot or moving part.
Assuming labels prevent accidental activation
Clear labels do not stop a front-mounted knob from being bumped by a hip, child, pet, bag, or cleaning cloth. They also do not correct a control involved in a safety recall.
Find the model and serial number, check the manufacturer’s instructions, review current recall information, and use official repair or lockout remedies when applicable. Do not improvise a cover that blocks ventilation or interferes with normal shutoff.
Key takeaway: A label should never become the new source of confusion. Preserve factory information, control movement, warning lights, and the true pointer position.
When Better Labels Are No Longer Enough
Sometimes the safest result of a labeling project is discovering that the problem is larger than print size. Treat that discovery as useful information, not failure.
Call the manufacturer or a qualified appliance technician when
- The knob does not stop firmly at OFF.
- The oven continues heating after being turned off.
- The knob, control panel, or display is loose.
- The display flickers or shows inconsistent settings.
- The selected temperature does not correspond with normal operation.
- The control activates without a deliberate action.
- A label would need to cover damaged or missing factory markings.
- The model may be affected by a current recall or manufacturer safety notice.
Seek a low-vision or occupational-therapy assessment when
- Vision loss affects several kitchen tasks, not only the oven.
- Glare, field loss, or reduced contrast makes the panel difficult despite larger text.
- Hand tremor, arthritis, weakness, numbness, or limited reach interferes with control use.
- The user cannot distinguish the modified controls consistently.
- A touch panel activates during exploration by touch.
- Lighting, body position, or appliance placement creates additional risk.
- The household is considering a replacement oven and needs accessibility criteria.
Reassess independent oven use when
- The oven is left on more than once.
- Food, pans, towels, or utensils are repeatedly burned.
- OFF is no longer recognized consistently.
- Oven, burner, timer, and clock controls are confused.
- Cooking sequences cause visible distress or disorientation.
- The person denies that the appliance is running despite heat, lights, or alarms.
- Supervision is needed for most steps of a previously familiar task.
For someone living with dementia, cooking ability may change over time. The Alzheimer’s Association home-safety guidance can help families review supervision, appliance access, environmental changes, and other household risks.
Consider whether another cooking method is easier to control
A different appliance is not automatically safer. An air fryer, toaster oven, microwave, induction unit, or smart appliance may introduce new touchscreens, menus, hot surfaces, or memory demands.
Compare the entire task: reading the controls, loading food, selecting the setting, confirming operation, hearing or seeing completion alerts, removing hot cookware, and shutting the appliance off. Our guide to air fryer controls for seniors illustrates why a smaller appliance can still be difficult when its interface is crowded or touch-sensitive.
Frequently Asked Questions
What is the best color combination for an older adult?
Choose the highest practical contrast against the appliance, often black on white, white on black, or another clearly separated dark-and-light pairing. Use a matte surface and test the label under normal kitchen lighting. Color should support words or tactile meaning rather than replace them.
Should every oven temperature be labeled?
Usually not. Start with OFF and the one or two temperatures the person uses most. Too many labels can reduce spacing, hide factory references, and recreate the same visual crowding the project was meant to solve.
Can bump dots be placed directly on an oven control panel?
They may be useful on an appropriate cool, stationary area, but placement must not obstruct buttons, displays, indicator lights, vents, warnings, or knob movement. Check that touching the area does not activate a capacitive control.
Should OFF have a tactile marker?
OFF is often the most useful tactile landmark because it provides a consistent starting and ending position. The marker should be unique, easy to distinguish, securely placed, and aligned with the true manufacturer position.
Can handwritten masking tape be used temporarily?
It may help during a brief, supervised placement trial. It is not ideal as a dependable permanent system because handwriting can be unclear and tape may curl, stain, shift, reflect light, or leave residue.
How often should oven labels be checked?
Check them after cleaning, appliance service, knob removal, or any report of confusion. Replace a label whenever it fades, loosens, shifts, curls, becomes glossy, or no longer aligns with the factory marking.
Are oven labels enough for someone with dementia?
Not necessarily. A person who forgets that the oven is operating, cannot recognize OFF, confuses cooking controls, or has declining judgment may need supervision, restricted appliance access, automatic shutoff features, meal support, or a professional home-safety assessment.
What should I compare when replacing a difficult touchscreen oven?
Compare physical knobs, tactilely distinct buttons, display contrast, character size, audible confirmation, control-lock operation, accidental-activation resistance, app accessibility, voice support, reach distance, and whether the controls can be explored without triggering the appliance.
Run the OFF-and-350 Test in the Next 15 Minutes
You do not need a complete custom label set today. Begin with two temporary, high-contrast markers placed beside the original controls without covering anything:
- OFF
- The user’s most common baking temperature, often 350°F in familiar US recipes
Ask the older adult to stand in the normal cooking position, locate both markers, select the correct oven function and temperature, and return the control to OFF without prompting. Watch the pointer, not just the printed label.
If the sequence is accurate and comfortable, photograph the placement and repeat the trial several days later. If the user hesitates at the wrong control, cannot confirm OFF, or needs repeated rescue prompts, stop adding stickers. The next step is a better assessment of the appliance, lighting, vision, hand function, or cooking routine.
Your 15-minute finish line
Do not ask whether the labels look attractive. Ask whether the user can find the correct control, understand the setting, and return the oven to OFF calmly and independently. That small sequence is the whole project in miniature.
Last reviewed: 2026-08