

Organize your questions and next steps, then save your worksheet.
Summary and next steps
Improve one sewing task with steadier light and contrast while keeping hands clear of sharp or moving parts.
- Choose a small familiar project and a stable work surface.
- Check whether the thread or seam remains visible.
- Follow the machine manual before changing a needle or accessing moving parts.
Editorial maintenance: October 24, 2026. Summary layout, related links and technical metadata updated. This is not a full clinical review.
Senior sewing, made calmer
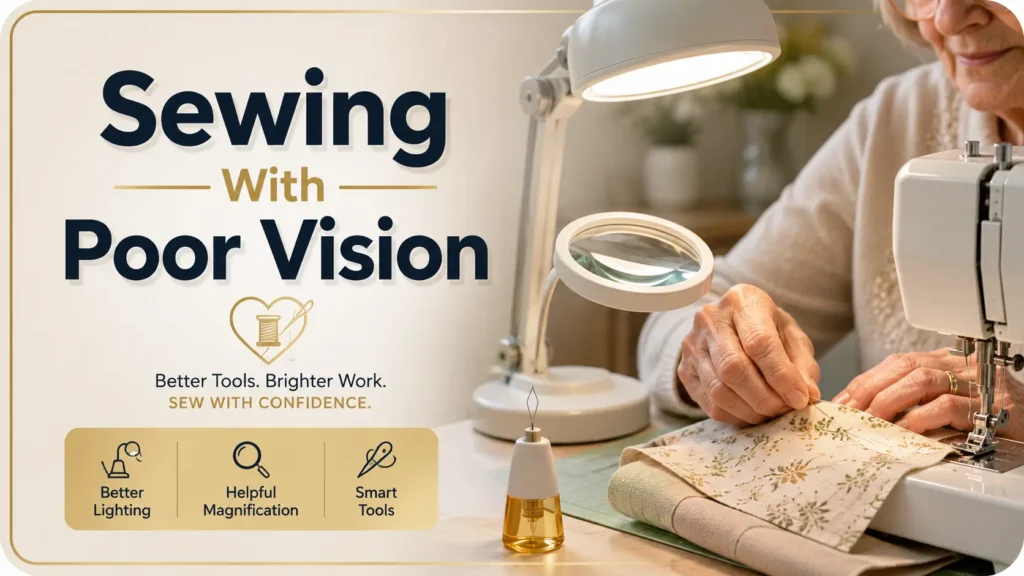
How to Make Sewing Easier for Seniors
with Poor Near Vision
Sewing is full of tiny negotiations: the needle eye, the thread tail, the seam line that seems to vanish the moment the fabric turns dark. For seniors with poor near vision, the hobby does not always need to end. Often, it needs a better stage: steadier light, louder contrast, kinder tools, and a setup that stops asking the eyes to do all the heroic work.
This guide is written for older sewists, adult children, caregivers, quilters, menders, and anyone trying to keep a beloved craft within reach. We will look at lighting, magnifiers, needle threaders, safer cutting, machine setup, easier fabrics, and the warning signs that should move the question from the sewing table to an eye care professional.
The goal is not to buy a basket of gadgets and hope for magic. The goal is to reduce visual load, one small repair at a time, so the work feels less like wrestling fog and more like returning to a familiar song.
See the seam sooner
Use light direction, contrast, and guides so the eyes are not chasing every stitch.
Thread without the battle
Compare larger-eye needles, self-threading needles, and automatic threaders.
Keep the hobby safer
Know when blur, glare, floaters, or eye pain should pause the project.
One good sewing station can feel like a tiny lighthouse on the fabric table. 🧵
Snapshot
This article is for seniors who still want to sew, caregivers setting up a safer craft area, and hobbyists struggling with threading, cutting, pattern reading, or eye strain. By the end, you will know how to improve light, choose low-frustration tools, reduce glare, compare magnifiers, and decide when vision changes need professional attention.
Table of Contents
Before You Sew: When Poor Near Vision Needs Eye Care
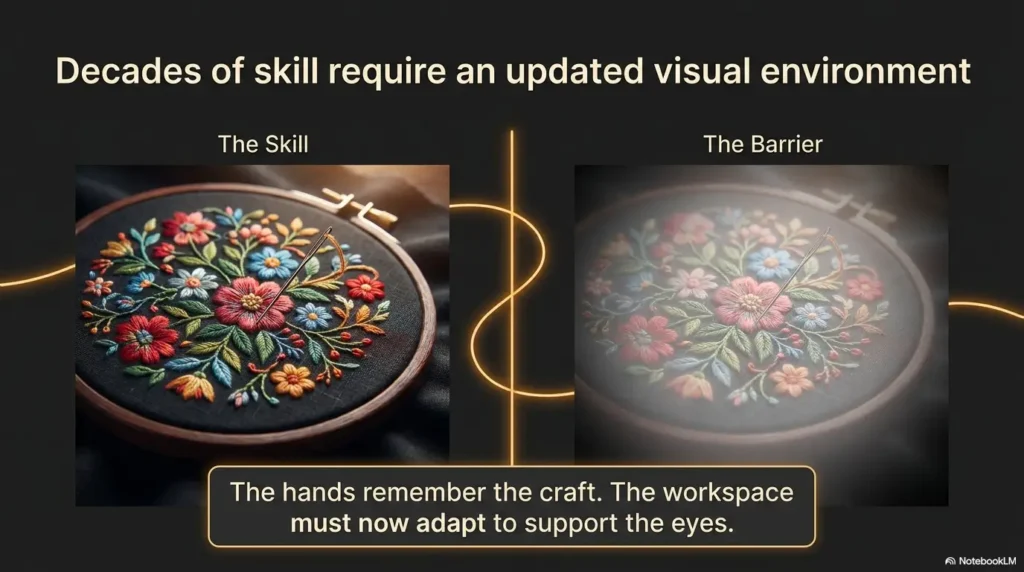
Poor near vision can be ordinary presbyopia, which is the age-related difficulty many people notice when close work starts drifting farther from the face. But sewing asks more from the eyes than reading a menu. It requires depth, contrast, steadiness, sharp edges, and safe tool handling.
That is why the first improvement is not a magnifier. It is knowing whether the vision problem is stable enough for sewing.
Before you act
This article offers practical sewing setup ideas, not a diagnosis or a replacement for eye care. Sudden blur, eye pain, new flashes, many new floaters, a curtain-like shadow, one-sided vision change, injury, or vision loss with headache or weakness deserves prompt medical attention. If the person has diabetes, glaucoma, cataracts, macular degeneration, recent eye surgery, or medication-related vision changes, ask an eye care professional what close work is safe.
Sudden blur is not a sewing problem
If the sewing machine looked fine last month and now the needle plate looks smeared, do not solve that by buying three magnifiers at midnight. Sudden or worsening blur may need an eye exam, especially if it affects one eye more than the other.
A simple home observation helps: ask whether the person can read familiar print, see the edge of scissors, and identify thread against fabric in good light. If the answer changed quickly, pause the project.
Eye pain, flashes, floaters, or shadows need attention
New flashes, a sudden shower of floaters, or a dark curtain in the vision are not craft-room inconveniences. They are reasons to seek timely eye care. Keep this rule plain enough for the sewing drawer: if the vision change feels sudden, strange, painful, or one-sided, stop sewing first.
For a clear medical overview, the American Academy of Ophthalmology explains warning signs connected with floaters and flashes.
Diabetes, glaucoma, cataracts, and macular degeneration change the rules
Some seniors can sew comfortably with reading glasses and better light. Others are working around cataracts, glaucoma-related field loss, macular degeneration, diabetic eye disease, or low vision that does not fully improve with ordinary glasses.
That does not mean sewing is off the table. It means the setup must respect the condition. A person with central vision loss may need different lighting and magnification than someone whose main issue is presbyopia. A person with diabetes may need regular eye monitoring even if their sewing vision seems “good enough.”
For related reading on close-up aging vision, see presbyopia reading tips for seniors and senior near vision problems.
Key takeaway
Make the sewing setup easier, but do not use tools to cover up a new medical warning sign. Stable difficulty with close work is one thing. Sudden change is another.
The Brightness Trap: Why More Light Can Still Fail
Many people hear “poor vision” and immediately add brighter bulbs. That can help, but only if the light is placed well. A sewing table can be bright and still hard to use if glare bounces off the surface, shadows cover the seam, or the lamp points into the eyes instead of across the fabric.
Use task lighting, not just room lighting
Room lighting fills the space. Task lighting helps the actual work. Sewing usually needs both.
A floor lamp behind the chair may make the room feel cozy, but it may leave the needle area in a small gray cave. Add a focused lamp that can be aimed at the stitch line, pattern mark, or hand-sewing area.
Aim light across the fabric, not into the eyes
Light should skim the work surface, not glare directly into the face. For many right-handed sewists, placing the lamp slightly to the left and forward works well because the working hand casts less shadow. Left-handed sewists may prefer the opposite.
There is no royal decree here. Move the lamp, sew two test inches, and notice what happens to the seam line. Your eyes will vote quickly.
Reduce glare from white tables and shiny tools
Bright white tables can act like tiny indoor snowfields. Glossy rulers, shiny scissors, and pale fabric can add more glare than clarity.
Try a matte cutting mat, a neutral cloth under the work, or a lamp with a diffuser. If glare is a recurring problem, this related guide on reading lamp position for central vision loss may help you think more carefully about angle and comfort.
Shadows can be more useful than brightness
A gentle shadow can reveal texture, edges, and raised seams. The trick is avoiding heavy shadows that hide the needle or cutting line.
Place the lamp so the seam casts a small visible edge. If everything looks flat and washed out, the light may be too direct or too harsh.
| Lighting problem | What it feels like | First fix to try |
|---|---|---|
| Too dim | The needle area looks muddy | Add an adjustable task lamp close to the work |
| Too much glare | The table or ruler shines back | Use a matte mat, softer bulb, or diffuser |
| Hand shadow | The hand blocks the stitch line | Move the lamp to the opposite side of the dominant hand |
| Flat-looking fabric | Seams and folds disappear | Angle light across the fabric to reveal texture |
Magnification That Actually Helps Both Hands Work
Magnification sounds simple until you try to sew with one hand holding a lens and the other hand trying to manage thread, fabric, and dignity. The best magnifier for sewing is usually the one that keeps both hands free.
Before buying, compare how the senior actually sews. Hand mending on the couch, quilting at a table, and machine sewing all need different support.
Hands-free magnifiers usually win for sewing
Neck magnifiers can help with quick repairs, labels, and short hand-sewing tasks. Clamp lamps with built-in magnifiers are better when the work stays on a table. Desktop magnifiers can help with pattern markings, seam ripping, and sorting needles.
Handheld magnifying glasses still have a place. They are useful for reading a package label or checking a tiny instruction. But once both hands are needed, handheld magnifiers become a small glass traffic jam.
Choose the right magnifier by task
| Magnifier type | Best for | Watch out for |
|---|---|---|
| Neck magnifier | Quick hand repairs, buttons, short mending | May wobble or require posture adjustments |
| Clamp magnifying lamp | Table sewing, seam ripping, close detail work | Needs a stable table edge and good positioning |
| Desktop stand magnifier | Patterns, labels, needle packs, sorting supplies | May not fit under moving fabric |
| Handheld magnifier | Reading instructions or checking a mark | Occupies one hand and can be tiring |
Avoid buying too much magnification
More magnification is not always better. Stronger lenses can reduce the viewing area and make it harder to judge where the fabric is going. That can turn sewing into a tunnel.
Start with the weakest magnification that makes the task comfortable. If tremor, neck pain, or hand fatigue is part of the picture, this comparison of handheld vs stand magnifiers for tremor may help you avoid an expensive mismatch.
Show me the nerdy details
Close sewing is demanding because the eye has to resolve tiny edges at a short working distance while the hands move. Magnification enlarges the target, but it can also shrink the useful field of view. That means a senior may see the needle eye better but lose awareness of the fabric edge, scissors, or presser foot. This is why stable lighting, contrast, posture, and hands-free positioning often matter as much as lens strength.
The best test is not reading a label in the store. The best test is a real sewing task: threading, aligning a seam, removing a stitch, and cutting a short fabric edge. If the tool helps all four, it is far more likely to earn its place on the table.
Threading Without the Tiny-Eye Battle
Threading is where many seniors quietly start to lose patience with sewing. The needle eye seems smaller, the thread frays, and the whole task begins to feel like trying to park a bicycle in a keyhole.
The fix is not moral strength. It is changing the system.
Use automatic needle threaders when possible
Many sewing machines include built-in needle threaders, but they are often ignored because they were confusing the first time. If the machine has one, learn it slowly with a contrasting thread and bright light.
For hand sewing, small wire needle threaders are inexpensive, but they can bend. Keep several in a bright container and treat them as replaceable helpers, not heirloom tools.
Try self-threading or larger-eye needles
Self-threading needles have a small opening that lets thread slip into the eye from the top. They are useful for mending, buttons, and simple hand sewing. They may not be ideal for every fabric, but they can rescue a hobby from the brink of muttering.
Larger-eye needles are another practical option. The needle should still match the fabric. A thick needle in delicate fabric can leave visible holes, while a tiny needle can make threading unnecessarily difficult.
Keep thread ends crisp with sharp snips
A fuzzy thread end behaves badly. Use sharp snips and cut the thread at a slight angle. If the thread still frays, try a different thread or a tiny thread conditioner made for sewing, following the product directions.
Avoid relying on licking the thread. It rarely solves the real problem, and it can make the thread swell or bend. Crisp thread, good light, and a bigger target are the dependable trio.
Key takeaway
If threading is the part that ruins sewing, do not quit the whole hobby. Change the needle, sharpen the snips, add contrast, and use a threader before blaming your hands or patience.
High-Contrast Sewing: Make the Fabric Talk Louder
High contrast is one of the cheapest sewing upgrades for poor near vision. It helps the eye separate thread from fabric, fabric from table, and seam from shadow.
Perfect color matching may look elegant, but if the person cannot see the stitches, the project becomes a foggy little ordeal. Function gets the first chair in the orchestra.
Use contrasting thread for practice and hidden seams
Use light thread on dark fabric and dark thread on light fabric when the stitches will not be visible in the finished piece. For practice seams, mending inside a garment, or pillowcase construction, contrast can be more helpful than a perfect match.
For visible topstitching, choose a thread that is close enough to look intentional but still visible while sewing. The best thread is the one the sewist can actually control.
Place a contrasting mat under small pieces
Small fabric pieces disappear easily on busy tablecloths or patterned surfaces. Use a plain contrasting mat under the work. Dark fabric on a light mat, light fabric on a darker mat. Nothing fancy, just visual manners.
A matte surface is usually better than glossy. If pins, needles, clips, and thread scraps become easier to spot, the mat is doing its job.
Mark seams with bold pens, chalk wheels, or painter’s tape
Fine pencil marks can vanish under older eyes. Use bold washable marking pens when appropriate, chalk wheels, high-contrast tailor’s chalk, or painter’s tape as a temporary visual guide.
Always test marking tools on a scrap first. Some marks do not wash out easily, and some fabrics hold grudges.
The 5-Step Visibility Framework
1. Light
Aim light across the seam, not into the eyes.
2. Enlarge
Use hands-free magnification when detail work stalls.
3. Contrast
Make thread, fabric, and tools visually separate.
4. Guide
Use seam guides, tape, clips, and bold marks.
5. Simplify
Choose easier fabric and shorter sewing sessions.
Tool Swaps That Remove Fiddly Work
Some sewing tools are designed for sharp young eyes and calm fingers. Seniors with poor near vision may need tools that are larger, brighter, grippier, and less dependent on tiny alignment.
This is where cost can sneak up. A drawer full of clever gadgets is not the goal. A few well-chosen tool swaps can do more than a shopping spree.
Good, better, best sewing tool setup
| Budget tier | What to buy first | Best for | Avoid wasting money by checking |
|---|---|---|---|
| Good | Needle threaders, sharp snips, contrast mat, bright containers | Basic mending and hand sewing | Can the senior open, grip, and see each item? |
| Better | Adjustable task lamp, wonder clips, large-handle seam ripper, spring scissors | Regular sewing, quilting, simple repairs | Does the lamp reduce glare, not add glare? |
| Best | Hands-free magnifying lamp, safer rotary cutter, simplified machine setup | Frequent sewing with ongoing near-vision difficulty | Can the person test the setup on a real project before committing? |
Choose tools that are easy to find
Bright caps, large handles, and open trays matter. A tiny silver seam ripper on a gray table is practically undercover.
Look for large-handle seam rippers, magnetic pin dishes, wonder clips, spring-action scissors, and tool containers in bold colors. The tool should be visible before it is needed.
Be careful with rotary cutters
Rotary cutters can be easier than scissors for long straight cuts, but they are sharp. Choose safety guards, stable rulers, non-slip mats, and slow cutting habits. If vision is unreliable, fatigue is high, or the person cannot clearly see finger placement, use pre-cut fabric pieces or ask for help with cutting.
For caregivers, this is a good place to be warmly practical. Independence does not require doing the most dangerous part alone.
Pattern Reading Without Squinting Through the Fog
Patterns can be harder than sewing itself. Thin lines, tiny symbols, folded paper, and multi-size markings make a person feel as if the instructions were printed by ants with law degrees.
The fix is to enlarge, isolate, and simplify the information before cutting begins.
Enlarge printed patterns before cutting
If a pattern instruction sheet is difficult to read, photocopy or print it larger. For digital patterns, use a tablet or computer so the instructions can be zoomed. This is especially helpful for seniors who read better on screens with adjustable brightness and font size.
For more comfort with printed and digital text, you may also like best font size for seniors.
Highlight size lines before pinning
Multi-size pattern lines can overlap like spaghetti in a windstorm. Before cutting, trace or highlight only the size being used. Use a bold, visible color that does not bleed through in a confusing way.
For reusable patterns, place instructions in page protectors and use removable tabs for the current step. This keeps the table from becoming a paper blizzard.
Keep one instruction step visible at a time
Too much visual information increases fatigue. Cover the steps not being used with a plain sheet of paper. On a tablet, zoom so only the current step is visible.
This is a small act of kindness to the brain. The sewing project stops shouting all at once.
Key takeaway
Pattern reading gets easier when you separate reading from cutting. Enlarge, highlight, and simplify first. Then sew.
Fabric Choices That Forgive Poor Near Vision
Some fabrics are friendly. Some are tiny gremlins in formalwear. Seniors with poor near vision will usually have a better experience with fabric that stays where it is put, shows stitches clearly, and does not slide away at the first sign of confidence.
Stable cotton is easier than slippery satin
Quilting cotton, medium-weight cotton blends, linen blends, felt, and stable woven fabrics tend to be easier than satin, chiffon, velvet, sheer fabric, or stretchy knits. Slippery fabric demands more visual tracking and more hand control.
If the senior is rebuilding confidence, begin with forgiving projects: napkins, pillowcases, simple hems, fabric bookmarks, small repairs, or patching.
Medium colors often reveal stitches best
Black fabric can swallow stitches. Bright white fabric can glare under strong light. Medium colors often give the best balance because thread, chalk, and seam lines are easier to see.
Busy prints can hide mistakes, which sounds helpful until they also hide pins, seams, and markings. Use solid fabrics or simple prints for precision-heavy work.
Match project difficulty to vision energy
Vision energy is real. A senior may see well enough at 10 a.m. and struggle after dinner. Choose projects that match the best sewing time of day, not the imaginary stamina of a younger decade.
Save difficult seams, dark fabrics, and detailed work for the brightest, freshest part of the day. Keep easy mending for lower-energy times.
Machine Setup for Seniors Who Sew by Feel
Machine sewing can be easier than hand sewing for some seniors because the machine controls stitch formation. It can also be harder if the needle area is dim, the buttons are tiny, or the machine runs too fast.
The goal is to help the senior sew by clear guides and steady rhythm, not by staring intensely at the needle.
Add needle-area lighting
If the built-in machine light is weak, add a small adjustable sewing light or position a task lamp so the needle plate is clear. Avoid placing light where it reflects off the metal plate into the eyes.
Clean the needle area too. Lint, thread scraps, and dust can make everything look softer than it is.
Use a seam guide instead of watching the needle
Watching the needle is tiring and not always the best habit. A seam guide, painter’s tape, magnetic seam guide, or high-contrast line on the machine bed can help the fabric stay aligned.
Tell the sewist to watch the fabric edge move along the guide, not the needle stabbing up and down like an impatient woodpecker.
Slow the machine and label controls
If the machine has speed control, lower it. If the foot pedal is jumpy, use short test seams to rebuild control. A non-slip mat under the pedal can prevent sliding.
Label key buttons with high-contrast stickers: power, speed, reverse, needle up/down, stitch length, and thread cutter if present. Keep labels large and simple. For home setup ideas beyond sewing, see pantry labels for seniors, which uses the same visual logic: make important items easy to recognize before stress arrives.
Machine setup checklist
- Needle area is brightly lit without glare.
- Thread color contrasts enough to check stitches.
- Seam guide is visible from the sewing position.
- Foot pedal sits on a non-slip surface.
- Most-used buttons have high-contrast labels.
- Machine speed is slow enough for relaxed control.
The Senior Sewing Station: A Safer 10-Minute Setup
A better sewing station does not have to look like a catalog room. It needs to put the right things where the eyes and hands can find them without a scavenger hunt.
This section is especially useful for adult children and caregivers who want to help without taking over.
Put tools in open, bright containers
Use shallow trays, small bowls, or open bins. Closed boxes look neat until every repair begins with digging. Put needles, threaders, clips, scissors, and seam rippers in separate containers with clear contrast.
For seniors who already use a bedside organization system, the same idea works in the sewing corner. Keep the essentials visible, reachable, and boringly consistent. Boringly consistent is a compliment here.
Make the chair, table, and pedal work together
Poor posture can make poor near vision feel worse. If the table is too high, the shoulders rise. If the chair is too low, the person leans forward. If the pedal slides, the body stiffens.
A comfortable sewing position lets the senior sit close enough to see without hunching. Feet should rest securely, and the machine pedal should stay put.
Store sharp tools in safe, visible places
Sharp tools should not vanish under fabric. Use bright sheaths, marked containers, or a dedicated tray for scissors, rotary cutters, and seam rippers.
If grandchildren visit, pets nap near the sewing table, or the senior has memory changes, build a closing routine. Sharp tools away, pins counted, machine unplugged, lamp off.
10-minute caregiver setup
- Clear the table except for the current project.
- Add one adjustable task light and test glare.
- Place a contrast mat under the work area.
- Put sharp tools in one bright tray.
- Put threaders, clips, and needles in separate open containers.
- Add a non-slip mat under the foot pedal.
- Label the machine’s most-used controls.
- Choose one simple project for the first session.
For broader low-vision safety planning, the National Eye Institute has an accessible overview of low vision and common causes.
Common Mistakes That Make Sewing Harder
Most sewing frustration comes from small mismatches. The lamp is wrong, the thread is invisible, the scissors are dull, the project is too ambitious, or the person keeps sewing long after their eyes have politely resigned.
Mistake: buying magnifiers before fixing lighting
Magnification under bad light is still bad light. Fix brightness, glare, and shadows first. Then test whether magnification is still needed.
Mistake: using matching thread too soon
Matching thread is beautiful when the stitch line is already under control. For practice, hidden seams, and tricky repairs, contrast is often the safer choice.
Mistake: keeping old dull scissors out of habit
Dull scissors make cutting less accurate and more tiring. If the senior squeezes hard, saws at fabric, or avoids cutting altogether, sharpen or replace the scissors.
Mistake: sewing when tired or eye-strained
Many seniors do better with shorter sewing sessions. Try 20 minutes, then stop and check comfort. If the eyes burn, water, ache, or blur, take a break. A hobby should not feel like a tiny endurance trial.
Cost-saving rule
Before buying a premium magnifier, new machine, or full basket of adaptive tools, test three low-cost changes: better task light, higher contrast, and a needle threader. If those help, you will know what kind of upgrade is actually worth comparing.
Short Story: The button that came back
Marion had stopped mending shirts after she turned seventy-eight. She told her daughter the machine was “too fussy now,” which sounded final enough to end the conversation.
One Saturday, they tried a smaller repair: one loose button on a blue cardigan. Her daughter cleared the table, set a lamp to the side, placed white thread on a dark mat, and handed Marion a self-threading needle.
The button took twelve minutes. It was not perfect. One stitch leaned like it had opinions. But Marion smiled because the task had become visible again.
The lesson was simple: the hobby had not disappeared. It had been buried under poor light, tiny tools, and projects that asked too much at once.
FAQ
What is the best lighting for seniors who sew?
The best lighting is usually a combination of comfortable room lighting and an adjustable task lamp aimed at the sewing area. The lamp should reduce shadows without shining into the eyes or creating glare on the table, ruler, or machine plate.
Are magnifying lamps good for sewing?
Magnifying lamps can be very helpful for table sewing, seam ripping, pattern marks, and hand repairs because they keep both hands free. They work best when the lens is stable, the light is comfortable, and the senior can maintain a relaxed posture.
What needle is easiest to thread with poor eyesight?
For hand sewing, self-threading needles and larger-eye needles are often easier. For machine sewing, use the correct machine needle for the fabric and learn the built-in needle threader if the machine has one.
Is hand sewing or machine sewing easier for seniors with poor near vision?
It depends on the person and the project. Hand sewing may feel calmer for small repairs, while machine sewing may be easier for straight seams when the machine is well lit, slowed down, and guided with tape or a seam guide.
How can seniors see dark thread on dark fabric?
Use stronger side lighting, a matte work surface, magnification if needed, and a seam guide. For hidden seams or practice work, choose a slightly lighter thread instead of exact matching black-on-black thread.
What sewing tools help with arthritis and poor vision?
Helpful tools may include spring-action scissors, larger-handle seam rippers, wonder clips, magnetic pin dishes, needle threaders, self-threading needles, adjustable task lamps, and hands-free magnifiers. The best choice depends on grip strength, tremor, posture, and the type of sewing.
Can poor near vision make sewing unsafe?
Yes. Poor near vision can make it harder to see needles, pins, rotary cutter edges, machine controls, and cutting lines. Safety improves when sharp tools are highly visible, cutting is slower, lighting is better, and the person stops when tired or strained.
When should a senior stop sewing and see an eye doctor?
Stop sewing and seek eye care if vision changes are sudden, worsening, painful, one-sided, connected with flashes or many new floaters, or accompanied by a curtain-like shadow. Seniors with diabetes, glaucoma, cataracts, or macular degeneration should also follow their eye care professional’s guidance.
The CDC explains how diabetes can affect vision, and the American Optometric Association offers a helpful overview of presbyopia symptoms and diagnosis.
Optional video: Open the video on YouTube (external site).
Your 15-Minute Next Step: Upgrade One Project
Do not start by redesigning the whole sewing room. Start with one unfinished repair or one simple project. A loose hem, a button, a napkin, or a small seam is enough.
Set a timer for 15 minutes. Add one strong task light. Put a contrast mat under the fabric. Use a needle threader or larger-eye needle. Choose thread that the senior can see. Place sharp tools in one bright tray.
Then sew slowly and stop while the eyes still feel comfortable. That small success tells you more than any product page: what helped, what still hurt, and what upgrade might be worth comparing next.
The one-project test
If sewing becomes easier after light, contrast, and threading support, keep refining the setup. If the work still feels unsafe, confusing, or newly blurry, pause and ask for professional guidance before buying more tools.
A good sewing setup does not force older eyes to pretend they are younger. It gives them better conditions, clearer choices, and a gentler way back to the fabric.
Last reviewed: 2026-07
PUT THIS GUIDE TO WORK · INTERACTIVE WORKSHEET
Sewing-label and instruction readability preview
Use this worksheet alongside the article: How to Make Sewing Easier for Seniors with Poor Near Vision. Use the fields provided to organize your notes and next actions, then save your worksheet.
Your entries stay in this page and are cleared when you reload. No account is needed. Saved files are downloaded only to your device.
Compare comfort and recognition under your actual conditions. A screen sample cannot reproduce printed size, glare, a device display, color accuracy, or all lighting conditions.
How to use your result
Save the worksheet before leaving this page. Recheck any quote, date, or instruction with the relevant provider, pharmacist, manufacturer, or official organization. A completed checklist means you recorded the steps, not that an outcome is guaranteed.
Worksheet added October 20, 2026. Read the article above for context and its stated review scope.