
Organize your questions and next steps, then save your worksheet.
Summary and next steps
Identify cords without treating a label as permission to keep an unsafe electrical setup.
- Review device names from an accessible position.
- Keep markings clear of vents, safety information and plug contacts.
- Arrange qualified help for damage, heat or uncertain loading.
Editorial maintenance: October 24, 2026. Summary layout, related links and technical metadata updated. This is not a full clinical review.
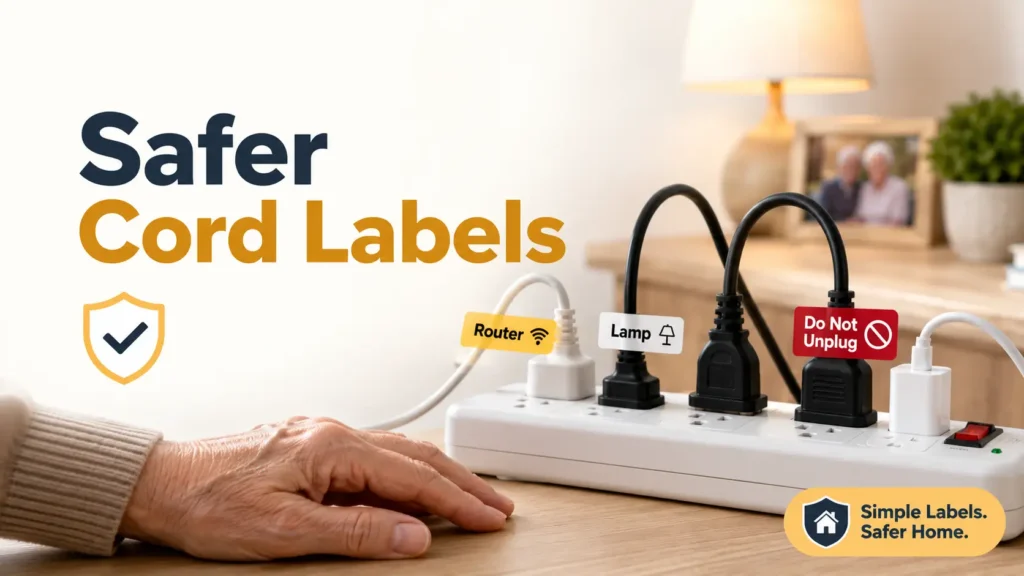
Senior home safety guide
How to Label Extension Cords and Power Strips for Seniors
Without Creating New Hazards
A cord label should do more than make a room look organized. For an older adult, the right label can prevent the wrong plug from being pulled, keep a phone base powered, reduce confusion behind a TV, and help a caregiver understand a setup in seconds.
The trouble is that labels can also create a false sense of safety. A neat tag on a frayed cord is still a frayed cord. A red sticker on a crowded power strip does not make that strip safe for a space heater. A tiny label hidden behind a recliner is little more than electrical wallpaper.
This guide gives families a practical labeling system: big print, plain words, color plus icons, overload warnings, trip-hazard thinking, and clear moments when the safer answer is not another label, but a replacement cord, a different outlet, or professional help.
Reduce unplugging mistakes
Label both ends so “router” and “phone base” are obvious, even during stress.
Spot unsafe setups sooner
Mark load limits, no-heater zones, damaged cords, and “call an electrician” signs.
Make caregiving easier
Create labels a cleaner, visitor, adult child, or emergency helper can read quickly.
The goal is not a prettier cord jungle. It is a safer, calmer home where every plug has a name and every risky setup has a stop sign. 🔌
Snapshot
This article is for adult children, caregivers, aging-in-place families, and seniors who want a simple way to label extension cords and power strips without making the home less safe. You will learn what to label, what never to cover, how to mark “do not unplug” devices, when to replace cords, and how to run a 15-minute room audit.
Before You Label, Know What This Guide Can And Cannot Do
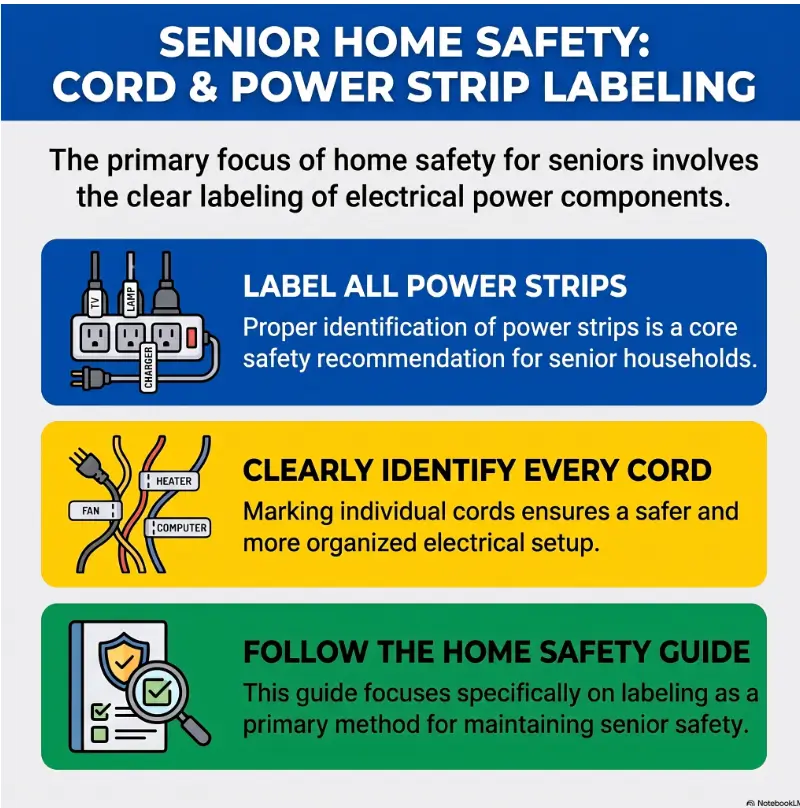
Labeling cords can make a senior’s home easier to understand. It can reduce accidental unplugging, make caregiver visits smoother, and help older adults with low vision or memory changes avoid a small mistake that becomes a large problem.
But labeling does not make electricity safer by magic. It is a communication tool, not a repair tool. If a cord is cracked, warm, loose, overloaded, crushed by furniture, hidden under a rug, or plugged into another power strip, the safer move is to fix the setup instead of decorating it.
Before You Act
This article is general home-safety education, not a substitute for a licensed electrician, fire-safety professional, medical-equipment provider, or healthcare clinician. Do not change power setups for medical devices without checking the device instructions or asking the provider. If you see heat, buzzing, scorch marks, frequent breaker trips, or frayed cords, pause the labeling project and get qualified help.
What a good cord label can do
A strong label answers a practical question at the moment someone needs it. “TV” tells a senior what the plug powers. “Do not unplug: phone base” tells a visitor what not to touch. “No heater here” tells everyone that the empty slot on a power strip is not an invitation.
For aging-in-place homes, the best labels are not clever. They are boring in the most beautiful way: large, matte, high-contrast, plain, and attached where the eye naturally looks.
What a label should never pretend to do
A label should never imply that a risky setup is approved. Avoid labels such as “safe,” “checked,” or “okay” unless a qualified person actually inspected the setup. Even then, a date and the person’s name are more useful than a vague green sticker.
Think of labels as small road signs. They guide behavior. They do not rebuild the bridge.
Official safety resources worth keeping nearby
For household electrical safety, families may want to review official fire-prevention and consumer-safety guidance alongside this room-by-room labeling system.
Start With The Cord Map, Not The Label Maker
The best way to label extension cords and power strips for seniors starts before you print or write anything. First, map what each cord actually does. Otherwise, you may create a neat little museum of wrong labels.
Pick one room. Start at the wall outlet. Follow each cord to the device. Say the device name out loud. Then write the label in the language the senior already uses.
Why “TV cord” is better than “black cord”
Many cords are black, white, gray, or beige. Color descriptions fall apart behind a cabinet, especially in dim light. “Black cord” may describe three different plugs behind the same entertainment center.
“TV cord,” “lamp by chair,” “router,” and “recliner motor” are better because they name the thing the person cares about. Labels should match the consequence of unplugging, not the appearance of the cord.
Key Takeaway
Label the job, not the jacket. “Phone base” beats “white cord” because it tells a senior what stops working if the plug is pulled.
The three questions every label should answer
A useful cord label answers three questions fast:
- What is this? Name the device: router, lamp, recliner, charger, TV.
- Where does it belong? Name the outlet or location: wall outlet behind couch, bedroom left outlet, TV strip.
- What should I do? Give the cue: do not unplug, unplug after use, no heater, leave on.
For example, “Router, wall outlet, do not unplug” is plain enough for a tired caregiver and direct enough for a visiting grandchild trying to charge a phone.
The hidden danger: labels that make unsafe cords look “approved”
Families often label everything in one sweep. That can accidentally make old or damaged cords look like part of the official system. A cracked extension cord with a fresh label still belongs in the discard pile.
Before labeling, separate cords into three groups: keep, replace, and ask for help. This small pause prevents the label maker from becoming a tiny rubber stamp of false confidence.
| Cord or Setup | Label It? | Safer Next Step |
|---|---|---|
| Clean, intact lamp cord | Yes | Label device name and outlet location |
| Router plugged directly into wall | Yes | Add “do not unplug” and reason |
| Frayed extension cord | No | Replace immediately |
| Power strip plugged into another power strip | No | Remove daisy chain and reassess outlets |
| Warm outlet or buzzing plug | No | Stop using and call a qualified electrician |
Who This Is For, And Who Needs A Different Fix
Cord labels are most helpful when the main problem is identification. They are less helpful when the problem is electrical capacity, device safety, or a medical setup that should not be changed without guidance.
Aging-in-place homes often include a blend of ordinary household devices and high-importance equipment. The label system should treat those categories differently.
Good fit: lamps, chargers, recliners, routers, and TVs
Labeling is a good fit for the cords that create everyday confusion. Behind a TV, the cable box, streaming device, router, sound bar, and lamp can turn into a nest of identical tails. Behind a recliner, a power cord may be hard to see and easy to disconnect while cleaning.
For these ordinary devices, the best labeling system is simple: device name on both ends, room location on the plug end, and a short action cue if needed.
Not enough: oxygen machines, CPAP devices, space heaters, or overloaded rooms
Some setups need more than labels. Oxygen equipment, CPAP devices, powered mobility equipment, and medical-adjacent devices may have specific instructions for power, placement, backup, cleaning, and emergency use.
Space heaters also deserve a firm boundary. A label can say “no heater,” but it cannot make a power strip suitable for one. If a senior relies on portable heat, the family should review safer heating options and outlet use rather than improvising with extension cords.
When labeling helps memory, vision, mobility, and caregiver handoffs
Labeling can support several real-world needs at once. Large print helps aging eyes. Color bands help scanning. Icons help visitors. Tactile tags can help when a plug is hard to see. A one-page outlet map helps adult children understand the room without playing detective behind the sofa.
If your parent already uses large-print systems elsewhere, connect this guide with familiar routines. A home that uses senior-friendly font sizes or clear pantry labels for seniors will feel more consistent if cord labels follow the same visual rules.
The Senior-Friendly Label Formula: Big, Plain, Durable
A good label for seniors has three traits: it is large enough to read, plain enough to understand, and durable enough to survive dust, heat changes, handling, and the occasional furniture shuffle.
The label does not need to win a design award. It needs to work at 8 p.m. in a dim room when someone is tired and trying not to unplug the wrong thing.
Use device name plus action cue plus safety warning
The strongest label pattern is short and repeatable:
Simple Label Formula
Device + Action + Reason
Example: Router, do not unplug, phone and internet stop.
Example: Recliner, leave plugged in, chair lift needs power.
Reasons matter because commands without context are easy to ignore. “Do not unplug” can feel bossy. “Do not unplug: phone base needs power for calls” feels useful.
Choose large print, high contrast, and matte surfaces
For many seniors, the best cord label is bigger than families expect. Tiny label-maker tape may look tidy to younger eyes, but behind furniture it often becomes a gray whisper.
Use bold, dark text on a light background or light text on a dark background. Avoid glossy tape where glare is a problem. If the senior already struggles with screen glare, medication labels, or food packaging, the same design principle applies: contrast beats prettiness.
For more household labeling ideas, the same visibility logic used in medication labels that are too small for seniors can help you choose print size, spacing, and contrast for cords.
Tiny label-maker text is decoration, not guidance
A narrow label with 9-point text may satisfy the organizer in the room, but it rarely helps the person bending behind a nightstand. Senior-friendly labels need breathing room.
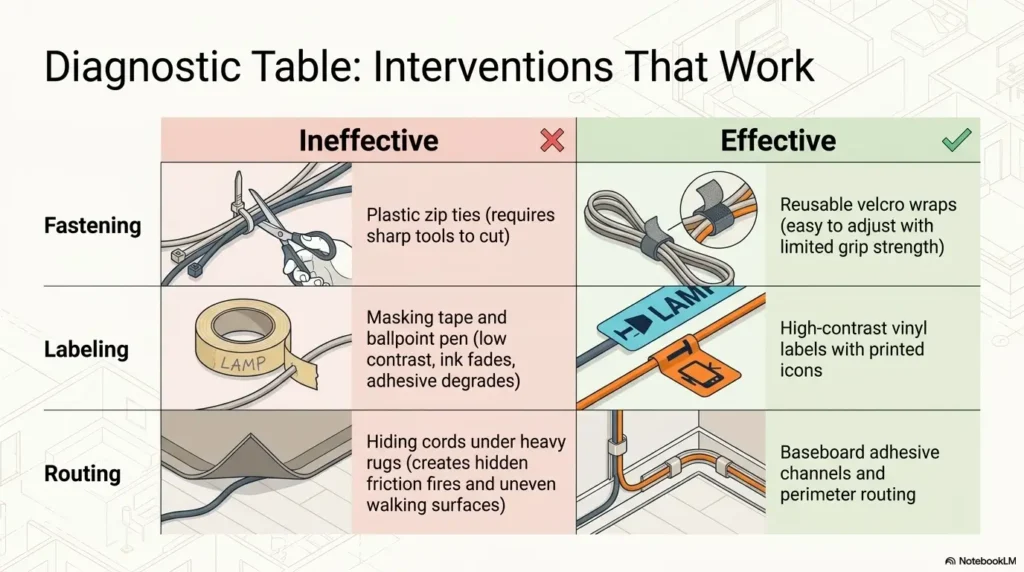
When space is tight, use a tag instead of wrapping text directly around the cord. A small hanging tag, cable flag, or folded label can display larger words without covering safety markings.
| Label Type | Best Use | Watch Out For |
|---|---|---|
| Large write-on cable tag | Most senior home cords | Make sure it does not slide into the plug |
| Flag-style label | Behind TVs, desks, routers | Use short words so both sides stay readable |
| Color band plus word label | Groups of cords | Do not rely on color alone |
| Tactile bump or raised marker | Frequently touched cords | Use only where it will not interfere with safe use |
| Printed label-maker tape | Neat setups with good lighting | Increase font size and contrast |
Color Codes That Do Not Turn Into Confetti
Color coding can help, but it can also become a cheerful little circus if every cord gets a different color with no system. The trick is to use color as a backup cue, not the whole message.
Every color-coded cord should still have words. For low vision, color blindness, dim rooms, and caregiver handoffs, words and icons make color safer.
Red for “do not unplug” or emergency power
Reserve red for the few cords that truly matter. If everything is red, nothing is red.
Good red-label candidates include a phone base, router, lift chair, emergency charging station, or a device the senior depends on daily. Pair the red label with the reason: “Do not unplug: emergency phone base.”
Blue, green, and yellow for rooms or device groups
Use simple group colors. Blue could mean TV and internet. Green could mean reading and lamps. Yellow could mean chargers. Keep the system small enough to remember without a legend taped to every wall.
For example, in the living room, a blue flag could mark “TV,” “router,” and “streaming box.” A green flag could mark “chair lamp” and “floor lamp.” The color helps scan, while the words do the real work.
Why color alone fails for low vision and color blindness
Color changes under poor light. Blue and green may look similar in shadows. Red may be hard to distinguish on certain backgrounds. Some older adults also have eye conditions that reduce contrast or make glare more disruptive.
The safer rule: color plus words plus placement. A red label that says “Do not unplug” near the plug end is far more useful than a red band wrapped somewhere along the cord.
Key Takeaway
Color is a pointer, not a sentence. Always pair color with plain words so a senior, visitor, or caregiver can understand the label without memorizing your system.
The Safer Cord Labeling Flow
1. Map
Follow each cord from outlet to device. Name what it powers.
2. Remove
Replace frayed cords, stop daisy chains, and clear rugs or pinch points.
3. Label
Use device name, action cue, and reason in large high-contrast print.
4. Review
Check labels after cleaning, furniture moves, new devices, or seasonal changes.
“Do Not Unplug” Labels: Where They Matter Most
“Do not unplug” should be used sparingly. When every cord has a warning, the warnings become background noise. Save it for cords where accidental unplugging creates real inconvenience, risk, or emergency confusion.
Internet routers, phone bases, medical-adjacent devices, and lift chairs
The most common “do not unplug” cords are not always dramatic. A router may support Wi-Fi calling, medication reminders, video doorbells, or telehealth visits. A cordless phone base may matter if the senior does not use a mobile phone reliably. A lift chair may affect mobility.
Medical-adjacent devices deserve extra caution. Before moving, unplugging, or rerouting anything connected with health equipment, check the instructions or contact the provider. Labels should reinforce the correct setup, not invent one.
Add the reason, not just the command
A label that says “Do not unplug” can frustrate helpers because it gives no context. A reason turns the command into care.
| Weak Label | Better Label | Why It Works |
|---|---|---|
| Do not unplug | Do not unplug: phone base needs power for calls | Explains the consequence |
| Important | Router: leave plugged in for Wi-Fi calling | Names the device and reason |
| Chair | Lift chair: leave plugged in so chair can rise | Connects power to mobility |
| Emergency | Emergency phone charger: keep outlet open | Guides future use |
The open-loop test: would a visitor know what happens if they unplug it?
Imagine a neighbor, cleaner, or visiting relative sees the label. Would they know what happens if they unplug the cord? If not, the label needs one more plain phrase.
Good labels close the loop: “Do not unplug: internet phone stops.” “Leave on: medical reminder hub.” “Keep plugged in: recliner lift.” The wording does not need to be elegant. It needs to prevent the wrong hand from doing the wrong thing.
Show me the nerdy details
A label works best when it reduces cognitive load. That means the reader does not have to remember a color chart, search for a hidden device, or infer why a cord matters.
The strongest cord labels combine four signals: visual contrast, location, device identity, and consequence. “Router, do not unplug, Wi-Fi phone stops” contains all four. It is also short enough to read under mild stress.
For seniors with low vision, the label should be readable at the distance where the task occurs. Behind furniture, that may mean larger labels near the plug, not tiny text near the device.
Common Mistakes That Make Cord Labels Less Safe
The most dangerous cord-labeling mistakes are not aesthetic. They happen when the label covers information, traps heat, hides damage, or distracts from a setup that should be removed.
Before buying a label kit, spend five minutes looking for these problems. The cheapest safety upgrade is often the cord you decide not to keep.
Do not cover UL, ETL, wattage, amperage, or warning information
Many cords, plugs, adapters, and power strips include safety markings or ratings. Do not cover them with tape, stickers, or sleeves. If you cannot see the rating information, you cannot check whether the setup makes sense later.
Place the label on the cord jacket or a tag, not over molded plug text, warning labels, reset switches, vents, or manufacturer information.
Do not wrap thick tape around heat-prone plugs or adapters
A little tag is different from a thick wrap. Avoid bulky tape around plugs, adapters, chargers, or anything that gets warm during normal use. Thick wrapping can trap heat, hide damage, and make it harder to notice looseness or discoloration.
If the plug or adapter feels warm, smells odd, buzzes, sparks, or looks discolored, stop using it and get help. A label should not become a blanket over a problem.
Do not label a damaged cord as “okay to use”
Never use a label to reassure someone about a cord that looks worn, cracked, loose, crushed, or frayed. The right label for a damaged cord is not “lamp.” It is “remove.”
If an older adult is reluctant to throw cords away, use a calm rule: if the cord is damaged, it leaves the room before the new labels arrive. One fewer unsafe cord is better than twelve perfectly organized risky ones.
Mistake Checklist
- Label covers safety markings or ratings.
- Tape is wrapped tightly around a plug or charger.
- Frayed cord gets labeled instead of replaced.
- Power strip is treated like extra permanent wiring.
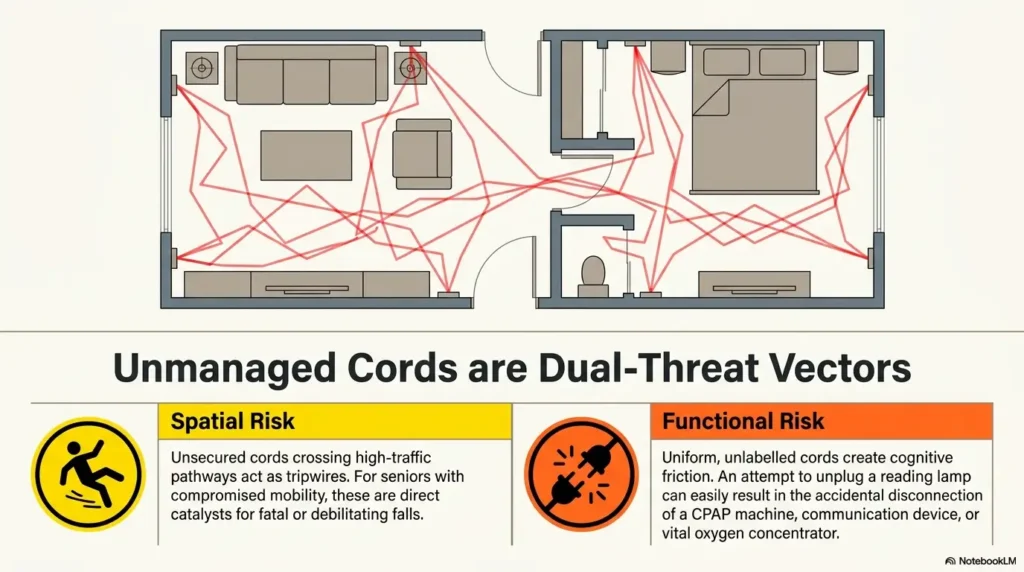
- Cord runs under a rug, across a doorway, or behind furniture that pinches it.
The Power Strip Problem Nobody Sees Until It Sparks
Power strips are where many labeling projects need a stern cup of coffee. They look harmless because they make outlets appear abundant. But an open slot is not the same as available capacity.
For senior homes, power strip labels should not only identify devices. They should warn against the most common overload habits.
Label total load, not just each device
If a power strip serves a TV area, label the strip itself: “TV strip only: TV, router, cable box, lamp.” This makes it clear what belongs there and what does not.
A device-by-device label is helpful, but the strip label gives the whole setup a boundary. That boundary matters when someone wants to plug in a heater, vacuum, air purifier, or extra charger.
Mark “no space heaters” directly on shared strips
Space heaters should not be treated like ordinary small electronics. If there is any chance a senior or visitor may plug one into a strip or extension cord, add a large label: “No space heaters.”
Place the warning where the plug would go, not on the far side of the strip. Safety messages need to be visible at the decision point.
An empty outlet is not always an invitation
Many families assume that if a power strip has six spaces, all six are available. That is not a safe assumption. The type of devices matters.
A strip that safely handles low-power electronics in one setup may be a poor place for heat-producing or high-draw items. Labels should teach the behavior you want: “chargers only,” “TV devices only,” or “do not add appliances.”
| Setup Choice | Good | Better | Best |
|---|---|---|---|
| Basic cord ID | Handwritten tag with device name | Large printed label on both ends | Large label plus outlet map photo |
| Power strip warning | “TV strip” label | “TV devices only” label | “TV devices only, no heater, no extra appliances” label |
| Low-vision readability | Bold marker on light tape | Matte high-contrast cable flags | High-contrast flags plus tactile cue for key cords |
| Caregiver handoff | Labels on plugs | Labels on both plug and device ends | Labels, room photos, and one-page outlet map |
| Risk control | Label existing setup | Remove damaged cords before labeling | Review warm outlets, overloads, and trip hazards before buying supplies |
Budget-conscious families can start with a marker, sturdy tags, and painter’s tape for planning. A mid-range setup may use larger cable flags, a simple label maker with readable font size, and a printed room map. A premium approach may include a licensed electrician review, cord covers where needed, better lighting, and caregiver documentation.
The point is not to spend more. The point is to spend where risk is highest.
Room-By-Room Label Ideas That Actually Get Used
Labels work best when they match the room’s real behavior. A bedroom label has different priorities than a home office label. A kitchen label should be stricter than a living room label.
Use the ideas below as a starting menu, not a script. The best label is the one the senior and caregiver will actually read.
Living room: TV, router, recliner, lamp, phone charger
The living room often has the densest cord knot. Start with devices that someone may unplug while cleaning, charging a phone, moving furniture, or trying to reset the TV.
- TV: “TV, leave in TV strip.”
- Router: “Do not unplug: Wi-Fi and phone may stop.”
- Recliner: “Lift chair power, keep plugged in.”
- Lamp: “Chair lamp, safe walking light.”
- Phone charger: “Daily charger, unplug when not used if preferred.”
If TV setup confusion is a recurring issue, link the cord labels with the labels on the screen inputs. A related guide on HDMI input labels for seniors can help make the remote, screen, and cords speak the same language.
Bedroom: clock, CPAP-adjacent setup, reading lamp, emergency phone
Bedroom labels should protect sleep, safety, and emergency communication. Label the clock, reading lamp, phone charger, and any device the senior may need during the night.
If there is CPAP equipment or another medical device, do not improvise. Label according to the device instructions and ask the provider before changing cords, outlets, extension use, or power backup.
For seniors with low vision, a safer bedside setup may also include a tray, a large-print phone note, and clear placement for glasses. A cord label is stronger when it supports the whole bedside routine, not just the plug.
Kitchen and bathroom: fewer cords, stricter rules, more GFCI awareness
Kitchens and bathrooms are not ideal places for casual extension cord habits. Water, heat, appliances, and limited counter space can turn “temporary” into trouble.
Label only what truly belongs there, and keep labels away from steam, heat, sinks, and appliance vents. If a senior regularly uses small appliances, pair labels with a simple rule: unplug and store after use when appropriate.
Kitchen cord safety fits naturally with broader routines such as kitchen appliance safety for seniors, especially if vision changes make buttons, cords, and hot surfaces harder to manage.
Home office corner: printer, modem, monitor, laptop charger
Home office corners often grow quietly. First comes a laptop. Then a printer. Then a shredder, lamp, monitor, modem, and three chargers that look like identical black noodles.
Use labels that prevent accidental resets and unnecessary service calls: “Modem, do not unplug unless troubleshooting,” “Printer,” “Monitor,” and “Laptop charger, remove after use.”
Key Takeaway
Label by room behavior. The living room needs unplugging prevention. The bedroom needs nighttime clarity. The kitchen needs stricter limits. The office corner needs reset-proof organization.
Trip-Hazard Labels: Because The Floor Is Part Of The System
Cord safety is not only about electricity. It is also about walking. A beautifully labeled extension cord across a walkway is still a trip hazard wearing a name tag.
For seniors, especially those with low vision, balance concerns, neuropathy, progressive lenses, or nighttime bathroom trips, the floor is part of the electrical system. Treat it that way.
Label both ends of long cords
If a cord runs behind furniture or across a hidden path, label both ends. The plug end should say what it powers. The device end should say where it plugs in.
For example: “Lamp, plugs into wall behind sofa” at the lamp end and “Chair lamp” at the outlet end. This prevents the classic furniture-moving mystery: one hand holding a plug, one eyebrow climbing toward the ceiling.
Use cord covers only where they make walking safer
Cord covers can help in some places, but they are not a universal fix. A raised cover can still be a bump underfoot. A cover in a doorway may create its own hazard. A cover that hides a damaged cord solves the wrong problem.
Use covers only when the cord truly cannot be rerouted and the cover improves walking safety. Choose low-profile, high-contrast options when appropriate, and check that the senior can see and step over the area safely.
Avoid rugs, doorways, pinched cords, and “temporary” setups that become permanent
Running cords under rugs is tempting because it makes the room look tidy. It also hides wear, heat, and lumps underfoot. Doorways and furniture pinch points are similarly risky.
If the cord has to cross a walkway, pause. The better answer may be moving the device, adding a different lamp location, using a properly installed outlet, or asking an electrician whether a safer permanent solution is needed.
Trip-hazard labeling pairs well with broader home checks, especially if the senior has low vision or uses progressive lenses. A room can be electrically organized and still unsafe if the walking path is cluttered.
Caregiver Setup: Make Labels Useful During Stress
The true test of a labeling system is not whether it looks good on a calm Saturday afternoon. It is whether it helps during stress, fatigue, cleaning, a device outage, or a hurried visit before an appointment.
Caregiver-friendly labels should reduce explanation. A helper should not need a family meeting to figure out which plug belongs to the router.
Create a one-page outlet map for the home
A one-page outlet map is a simple caregiver tool. It does not need to be architectural. It can be a plain list by room.
- Living room, outlet behind TV: TV strip only, router do not unplug.
- Living room, outlet by recliner: lift chair and reading lamp.
- Bedroom, left outlet: phone charger and clock.
- Kitchen counter outlet: small appliances only while in use.
Keep the map in a caregiver binder, on the inside of a utility cabinet, or in a shared family note. Do not post sensitive medical details in a public place where visitors do not need them.
Photograph each setup before moving furniture
Photos are the quiet heroes of cord management. Before moving a TV stand, recliner, nightstand, or desk, take a clear photo of the outlet and cord arrangement.
Then label the photo in your phone or print it for the home folder. A picture can prevent accidental rearranging, especially when multiple family members help at different times.
Add emergency notes for caregivers, cleaners, and visiting family
Emergency notes should be short and specific. Avoid a wall of instructions. Use the few points that truly matter.
| Situation | Useful Note | Where To Place It |
|---|---|---|
| Router must stay on | “Do not unplug router. Wi-Fi calling may stop.” | On plug tag and outlet map |
| Lift chair used daily | “Keep chair plugged in so it can rise.” | Near outlet and chair cord |
| Cleaner moves furniture | “Please do not unplug red-tagged cords.” | Caregiver note or cleaning checklist |
| Frequent room changes | “Take photo before moving cords.” | Outlet map folder |
Key Takeaway
The best caregiver system uses three layers: label the cord, photograph the setup, and keep a one-page room map. That way the information survives furniture moves, cleaning days, and family handoffs.
Short Story: The router that looked like a phone charger
Mara visited her father every Sunday. One afternoon, she found him annoyed because the “new phone” was not working. The phone was fine. The internet phone base had lost power.
Behind the side table were four black plugs. A cleaner had unplugged the router power adapter to use the vacuum, then plugged back the wrong cord. Nothing looked broken. Everything looked equally mysterious.
Mara fixed the connection, then made three labels: “Router, do not unplug,” “Phone base, do not unplug,” and “Lamp, okay to unplug.” She added a photo to the family note.
The lesson was small but sturdy: the label was not for Mara on a calm day. It was for the next person, in a hurry, holding the wrong plug.
When To Seek Help Instead Of Adding Another Label
Some homes do not need more labels. They need fewer risky setups. Knowing when to stop is part of the system.
If you are unsure whether a setup is safe, treat that uncertainty as useful information. The home is telling you where to slow down.
Call an electrician for warm outlets, flickering lights, buzzing, scorch marks, or frequent breaker trips
These signs deserve professional attention. Do not tape over them, label around them, or wait until “after the weekend” if the issue seems active or worsening.
A licensed electrician can assess whether the issue involves the device, cord, outlet, wiring, or load. That is not something a family label system can safely diagnose.
Ask a clinician or equipment provider before changing power setups for medical devices
Medical-device power setups can involve backup power, cleaning routines, placement rules, alarms, and manufacturer guidance. Ask before moving cords, adding extension cords, changing outlets, or plugging equipment into strips.
For home medical equipment, your label may simply say: “Do not move. Ask provider first.” That is a perfectly good label when the real answer is caution.
Replace damaged, loose, cracked, or frayed cords immediately
If a cord looks damaged, the decision is not whether to label it. The decision is how to remove it from use. Keep replacement simple: match the device instructions, choose the correct type, and avoid bargain-bin cords with unclear ratings.
For additional safety context, families can review nonprofit electrical-safety guidance before making household changes.
| Problem You Notice | Do Not Do This | Safer Action |
|---|---|---|
| Outlet feels warm | Add a warning label and keep using it | Stop using and ask an electrician |
| Cord is frayed | Wrap tape around it | Replace the cord or device as appropriate |
| Breaker trips often | Move devices to another crowded strip | Reduce load and get professional advice |
| Medical device setup is confusing | Reroute cords without checking | Ask the provider or clinician |
| Extension cord is permanent | Label it as normal | Consider a safer permanent outlet solution |
FAQ
What is the best label size for seniors with low vision?
Use the largest label that fits safely without covering plug ratings, warning information, vents, switches, or reset buttons. In practice, many families do better with cable tags or flag labels rather than narrow label-maker tape. Choose bold, high-contrast text and test readability from the distance where the senior will actually use the label.
Should extension cords and power strips be color coded?
Color coding can help, but it should never stand alone. Pair color with plain words and, when helpful, simple icons. Reserve red for “do not unplug” or emergency-related cords so the warning stays meaningful.
Can I put tape on a power strip?
You can place a clear label on a safe, visible part of the power strip, but do not cover ratings, warning text, switches, reset buttons, vents, or signs of damage. Avoid thick tape around plugs or adapters. If the strip is damaged, overloaded, or warm, do not label it for continued use.
What should a “do not unplug” label say?
Use the device name, command, and reason. For example: “Router, do not unplug, Wi-Fi phone may stop” or “Lift chair, keep plugged in, chair needs power to rise.” The reason helps visitors and caregivers make the right choice quickly.
Is it safe to use extension cords long term?
Extension cords are often intended for temporary use, and long-term use can create problems if cords are overloaded, damaged, pinched, covered by rugs, or used for high-draw devices. If a cord has become a permanent part of the room, consider whether a safer outlet arrangement or professional help is needed.
How do I label cords behind a TV or recliner?
Label both ends. At the plug end, write the device name and action cue: “Router, do not unplug.” At the device end, write where it goes: “Router power to wall outlet.” Take a photo before moving furniture so the setup can be restored later.
What labels should I use for emergency devices?
Use large red or high-contrast labels with the reason clearly stated. Examples include “Emergency phone charger, keep outlet open” or “Phone base, do not unplug, needed for calls.” For medical equipment, confirm the correct setup with the provider before changing or labeling anything.
How often should cord labels be checked?
Check labels after furniture moves, cleaning, new devices, seasonal appliance changes, room rearrangements, or any incident where the wrong plug was pulled. A quick monthly scan is helpful in homes with many devices or multiple caregivers.
Optional video: Open the video on YouTube (external site).
Next Step: Do The 15-Minute “Unplug Mistake” Audit
You do not need to label the whole house today. In fact, trying to label everything at once can create fatigue, clutter, and rushed decisions. Start with the room where one wrong unplug would cause the most confusion.
For many seniors, that room is the living room or bedroom. Choose one. Set a timer for 15 minutes. Follow the steps below.
The 15-Minute Unplug Mistake Audit
- Pick one room. Choose the room with the most cords or the most important devices.
- Find the “do not unplug” cords. Router, phone base, lift chair, essential charger, or medical-adjacent setup.
- Remove one unsafe setup. Look for frayed cords, daisy chains, rugs over cords, warm plugs, or crowded strips.
- Label only the cords that matter. Use device name, action cue, and reason.
- Take one photo. Save the setup before furniture moves or cleaning changes it.
That is enough for today. One room made clearer is not a small thing. It is a little pocket of order where a senior, caregiver, cleaner, or visitor can make the right choice without guessing.
The safest label is not the prettiest one. It is the one that prevents a mistake before anyone knows a mistake was possible.
Last reviewed: 2026-07
PUT THIS GUIDE TO WORK · INTERACTIVE WORKSHEET
Cord-label planning checklist
Use this worksheet alongside the article: How to Label Extension Cords and Power Strips for Seniors Without Creating New Hazards. Use the fields provided to organize your notes and next actions, then save your worksheet.
Your entries stay in this page and are cleared when you reload. No account is needed. Saved files are downloaded only to your device.
How to use your result
Save the worksheet before leaving this page. Recheck any quote, date, or instruction with the relevant provider, pharmacist, manufacturer, or official organization. A completed checklist means you recorded the steps, not that an outcome is guaranteed.
Worksheet added October 20, 2026. Read the article above for context and its stated review scope.